Instructions for a Windows User
Questrom ITS provides a virtual environment to students in classes requiring special Windows-only software.
Setup VMware Horizon Client for Mac and Windows
Students will be able to save/download files from Horizon to their local computer on a Mac or a PC by following the directions below
- Students will need to first download/install the Horizon client on their laptop
- If you have a company computer that cannot install software, see instructions for web-based vmware instead.
- Download Horizon Client for Mac
- Download Horizon Client for Window
- Launch the Horizon Application
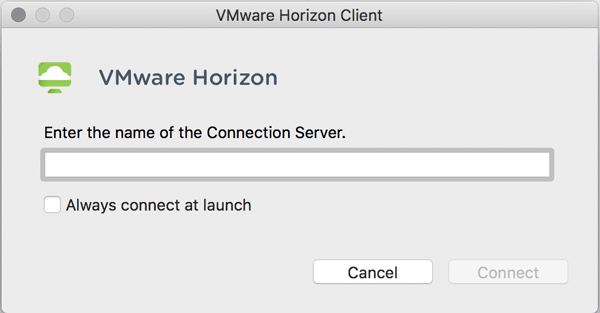
- Enter Questrom.horizon.vmware.com as the Connection Server
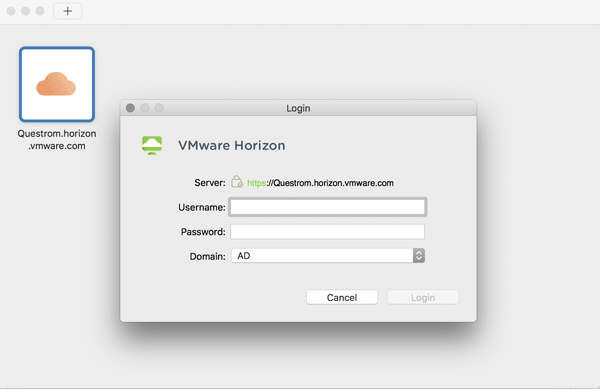
- Enter your username and Kerberos password
1
1
Enter Questrom.horizon.vmware.com on this screen
1
2
1
Enter your Kerberos username
2
Enter your password here
Opening files/assignments in VMware on a Mac
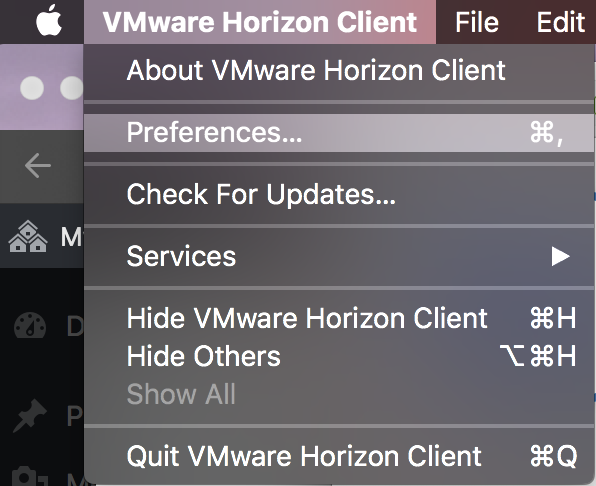
- Once connected to the application, click the VMware Horizon Client menu from the top menu bar to the right of the Apple menu. Select Preferences.
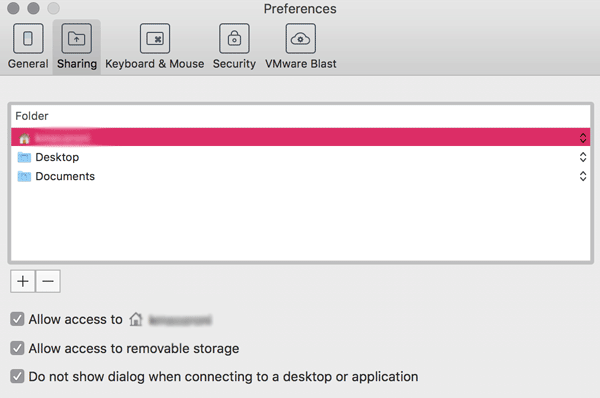
- This will bring up the preferences section of the VMware Horizon Client.Select the Sharing tab.
- You have three options to connect your local files with VMware
- Share your local files
- shares all locations including desktop, documents, and downloads
- Allow access to removable storage
- share any connected devices such as USB flash drives or external hard drives currently connected to your computer
- Add button
- browse for and select a specific folder on your computer that you want to share
- Share your local files
- Click X in the left hand corner when you are finished
- When opening or saving files, locate This PC and if it isn’t already, click to expand. Any of the folders/locations you have chosen to share will show up as on . Click which folder you would like to save to or open from.
- Once you have selected your location, click Save/Open as you normally would.
1
2
1
Hover over VMWare Horizon to open up the drop down
2
Click on Preferences to open the Preferences options
1
2
3
Opening files/assignments in VMware on a PC
-
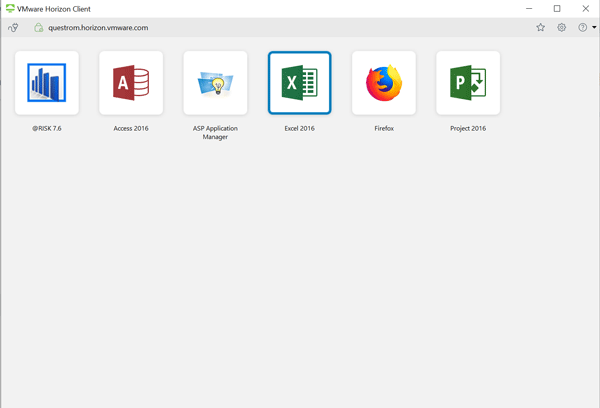
Once connected to the Horizon application, click the Setting icon (gray gear icon located in the upper right corner)
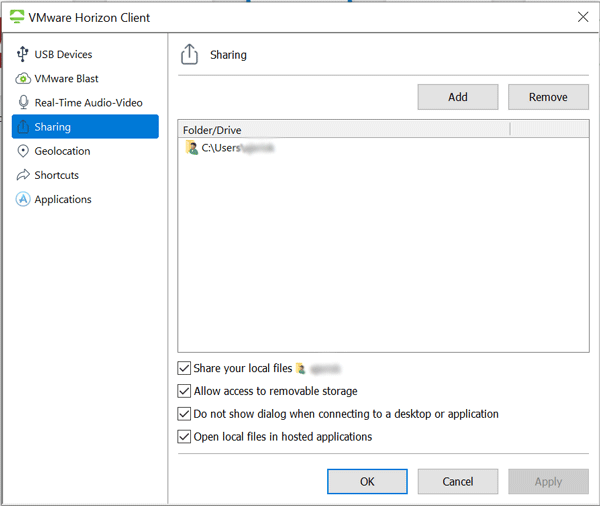
- This will bring up the settings section of the VMware Horizon Client.Select the Sharing tab.
- You have three options to connect your local files with VMware
- Share your local files
- shares all locations including desktop, documents, and downloads
- Allow access to removable storage
- share any connected devices such as USB flash drives or external hard drives currently connected to your computer
- Add button
- browse for and select a specific folder on your computer that you want to share
- Share your local files
- When you are satisfied with your configuration, remember to click Apply to save your settings. Then click OK to close the settings windows.
- The first time you run a virtualized application after updating your sharing settings, you may be prompted with an additional confirmation window asking you to allow the sharing. Click Allow.
- When opening or saving files, locate This PC and if it isn’t already, click to expand. Any of the folders/locations you have chosen to share will show up as on . Click which folder you would like to save to or open from.
- Once you have selected your location, click Save/Open as you normally would.
1
1
Click the gear icon to open the settings
1
2
3
4
4
Must be in the sharing tab to enable these settings
Saving files/assignments directly to a Mac or PC
- First Make sure you have shared your local folders with Horizon (see instructions for PC and instructions for Mac)
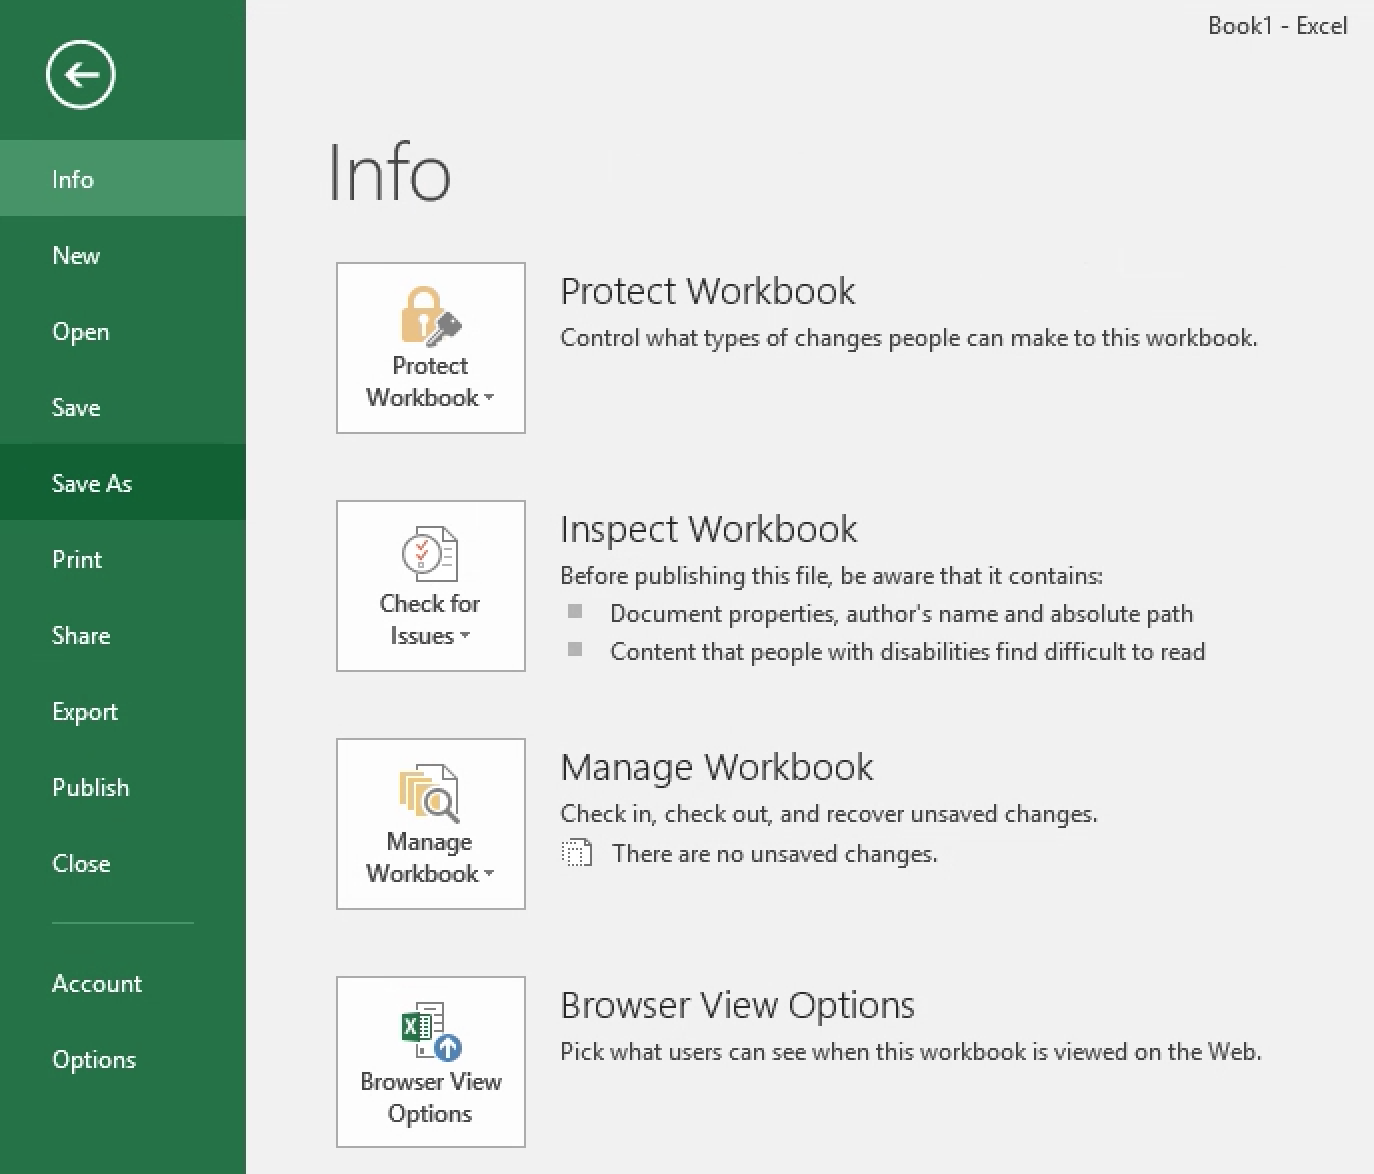
- To save a file directly to your computer, click on File -> Save As
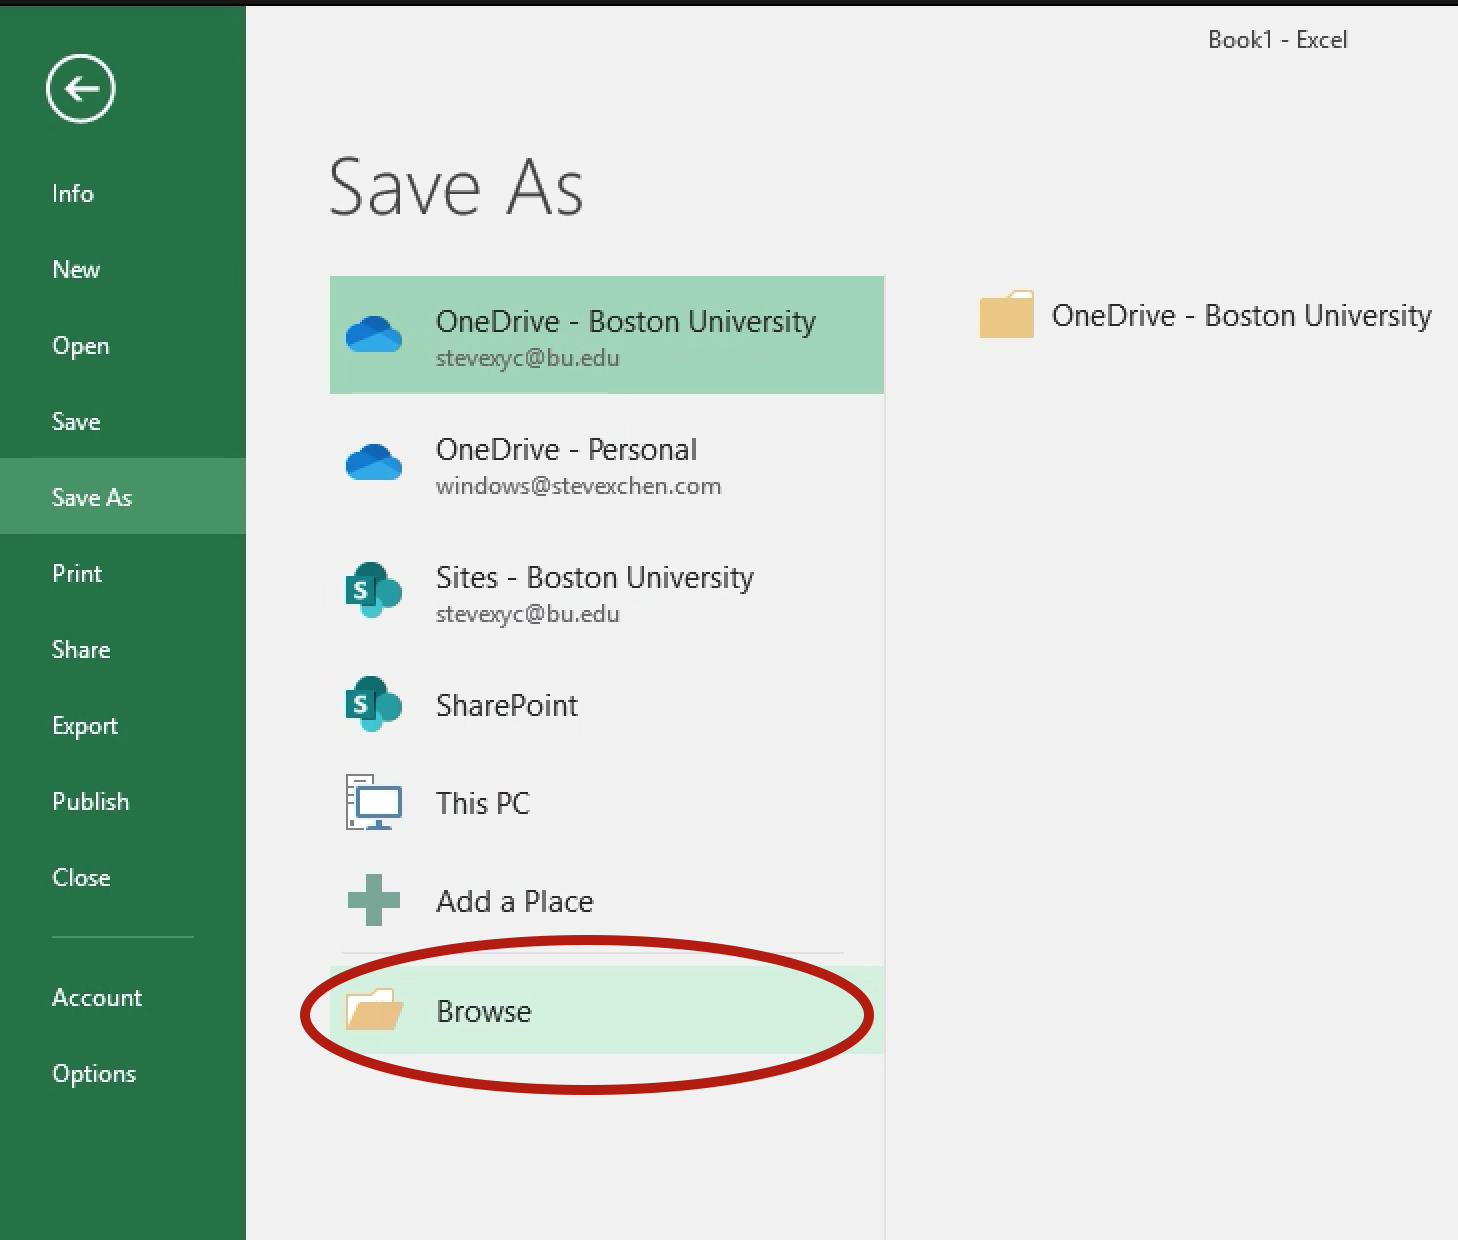
- Then click on Browse
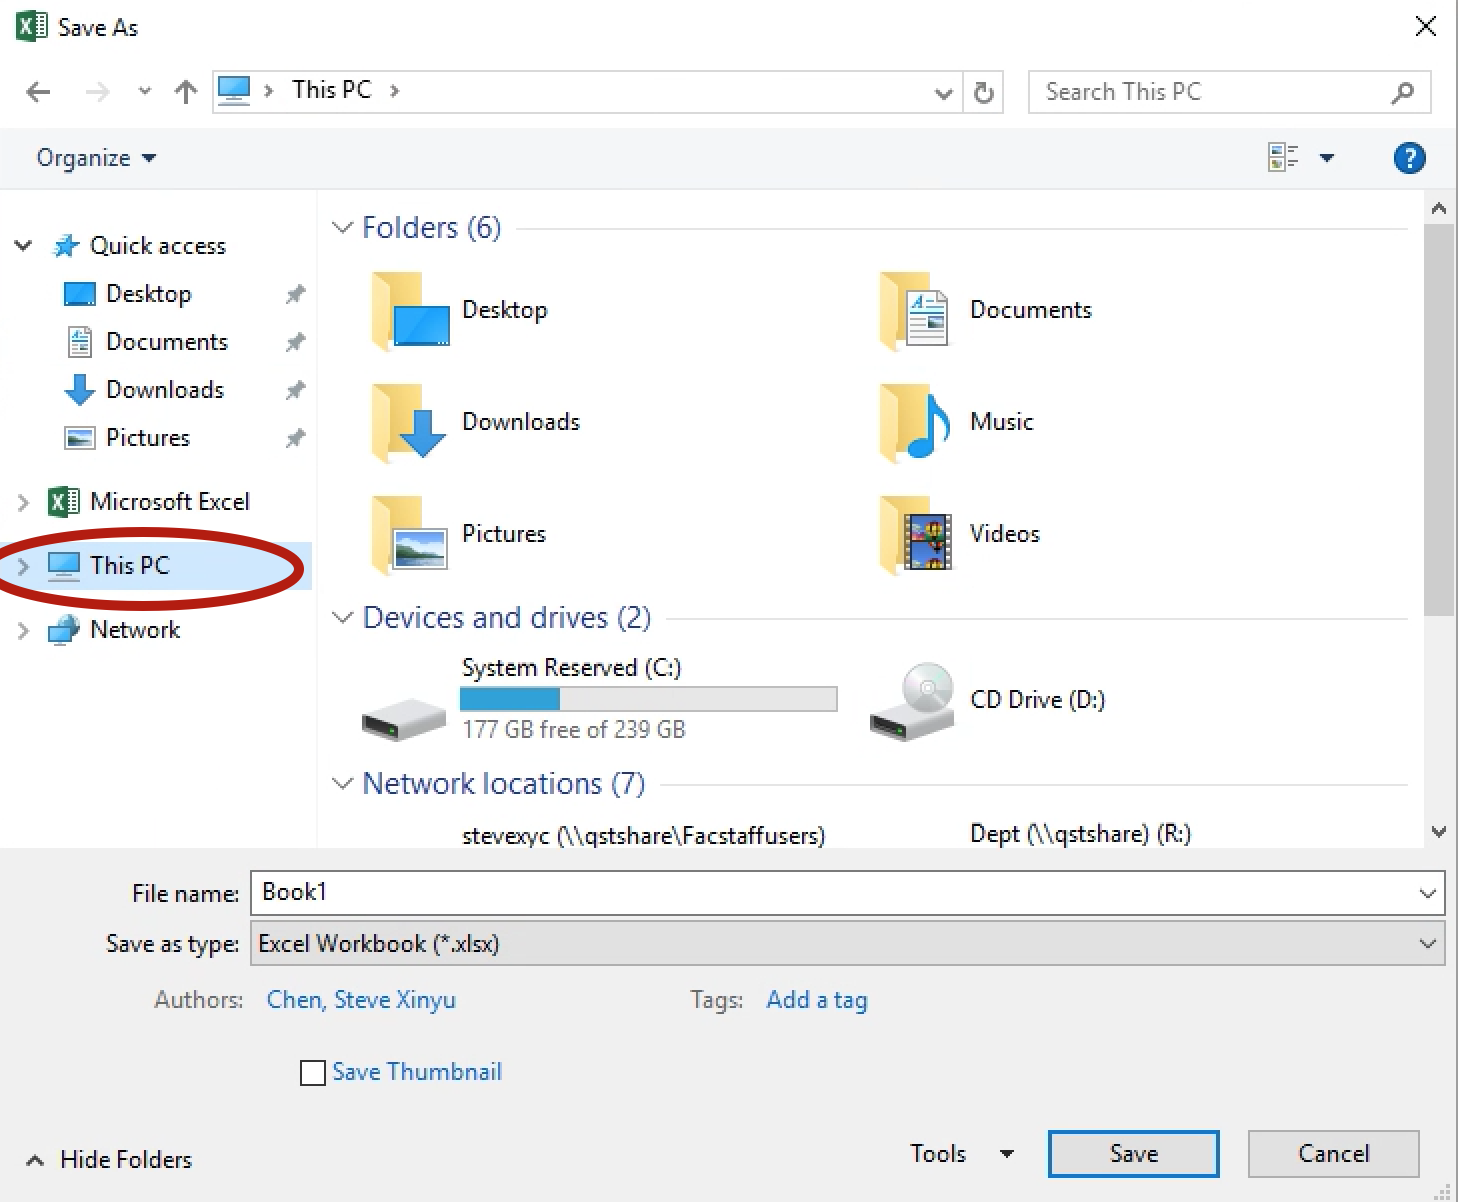
- In the pop-up window, choose This PC from the left side window
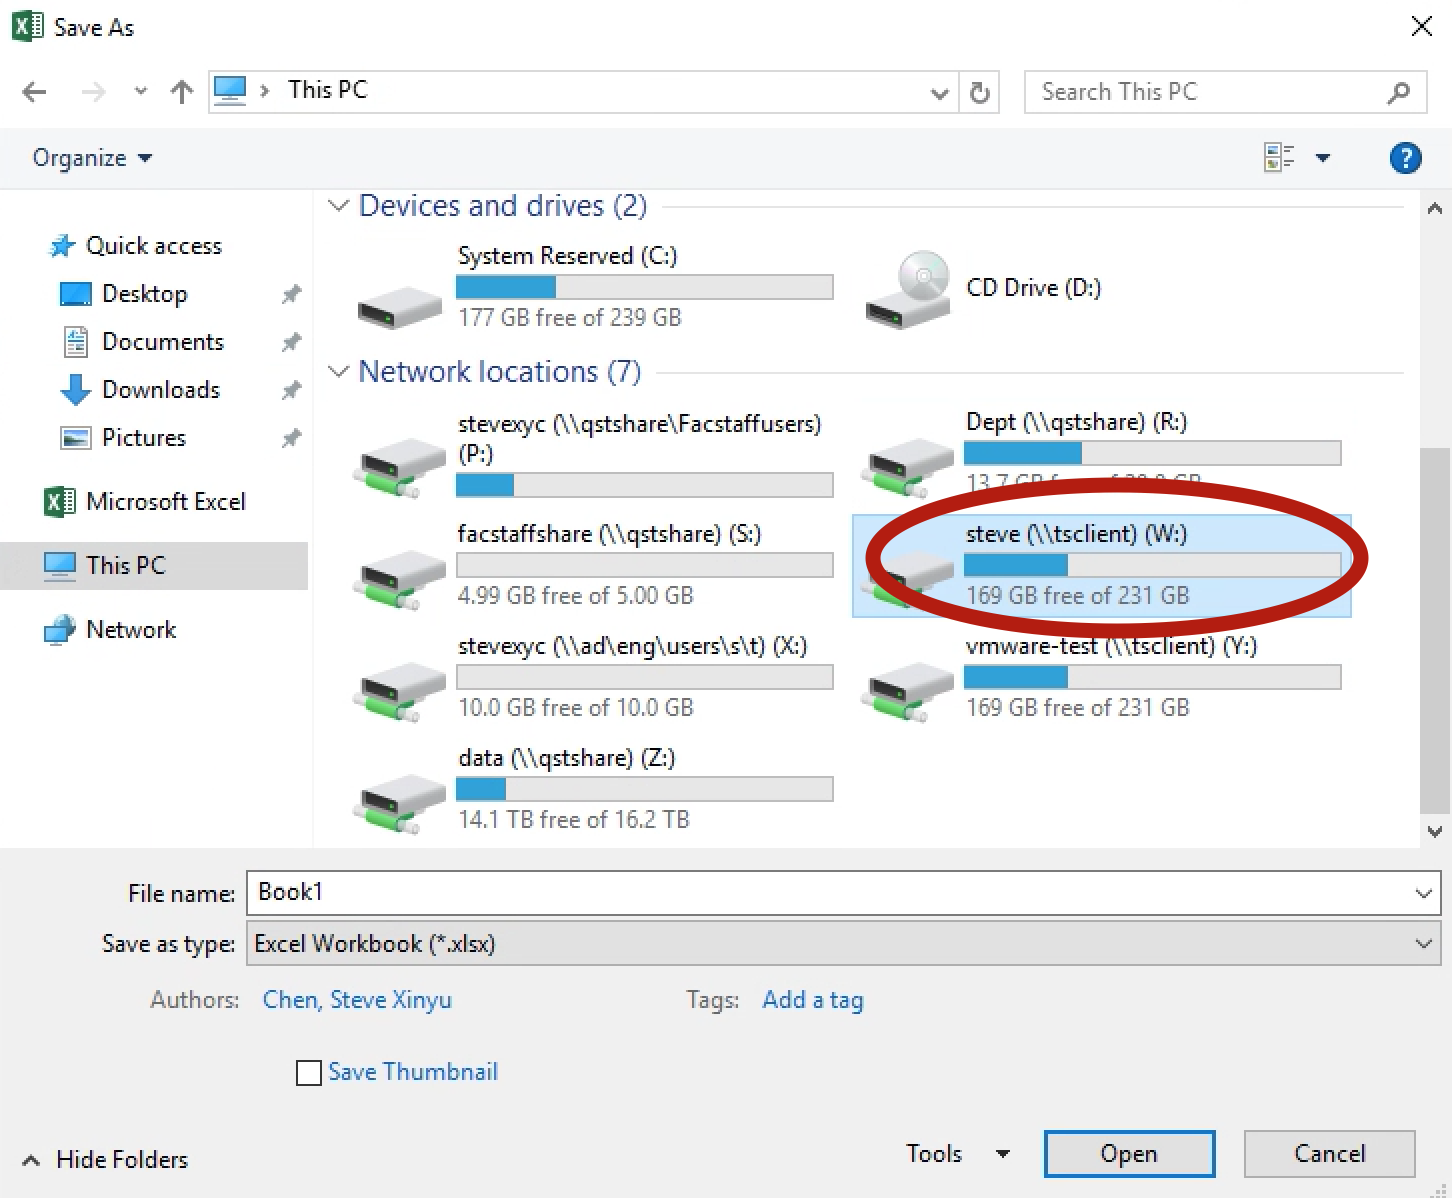
- Scroll down to the network drives section, select the drive that has tsclient in its name
- this drive is your computer, you can proceed to save to your folders (Documents, Desktop, etc)
1
1
1
1
XLMiner
1
Open VMware Horizon
- Open the VMware Horizon Application
- Login using your BU login and Kerberos password
2
Register the XLMiner Plugin
- Double click the “ASP Application Manger” icon
- When it opens click the “Register RSP Excel Add-In” button
- Click Exit
- Click the “Excel 2016” icon in the panel on the left to launch Excel, Click on the Data Mining option in Excel
Microsoft Project
ExPrep – Mac users instructions
- Go to https://questrom.horizon.vmware.com and logon using your BU username and BU email password
- Click on the ExPrep Excel 2016 icon – This will log you into a virtual Windows machine and it will launch Microsoft Excel
- Click on the blank Workbook to open Excel.
- Click on the EXPREP icon located at the top of the worksheet located next to View.
- Click on the Start icon located in the upper left hand corner to login to ExPrep.
- Enter your BUemail address and Exprep password (this password is the temporary password that was sent to you. If you have already change your password, enter your new password instead. If you did not get the email, check your junk email folder.

